Due to software update, a used-to-be handy tool in App Store is now demanding subscription
This is a long overdue blog.
It all started 9 months ago, when the developers of Parallel Desktop Lite released version 1.4.0, which turns free Linux image support into subscription. This seems very odd because the Lite version, if you don't pay extra, is basically just for Linux image virtualization, since they have Parallel Desktop for Windows images and others. Now after this update, which only seems to add a prompt when app start, asking customers to consent on subscription.
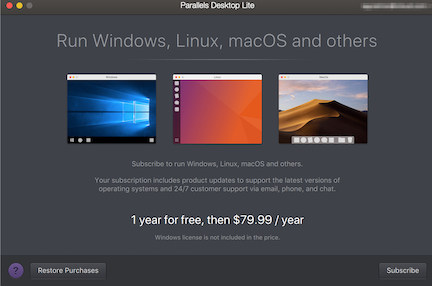
And if we do not consent, the app quit. We cannot even access existing VMs! I mean, if they have Parallel Desktop, which cost money to install, why bother have a lite version which now also required us paying for it?
Naturally, I am not happy with this change, especially with the fact that now we cannot even access our own data if not agree to pay. This is no different than forcing customers' hands and demanding us to pay to access our OWN property! The developers claimed they offer a first-year-free package, but this doesn't change the fact that if we do not agree to it, we cannot access our VMs. The solution they provides does not justify for their demands.
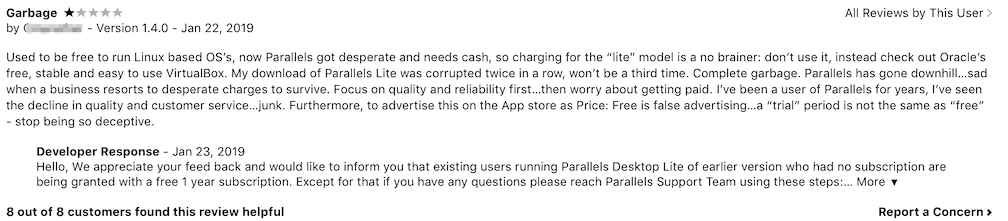
And I am not along in condemning developer's abrupt change in software usage policy, here are some comments from App Store.


So does that mean in order to access our data, we have to give in and agree to the subscription? No! And here is my solution.
Use VirtualBox to run Parallel Desktop Lite .pvm file (after transformation)
step 1
In Finder, right click the .pvm file, select Show Package Content. I am using a Ubuntu 14.04 images.
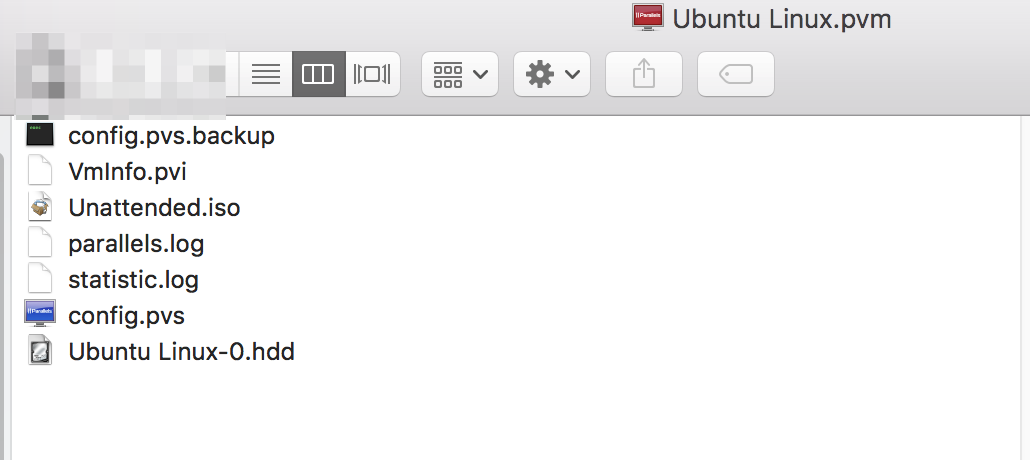
Select the .hdd file, right click and select Show Package Content again. You should see something like:
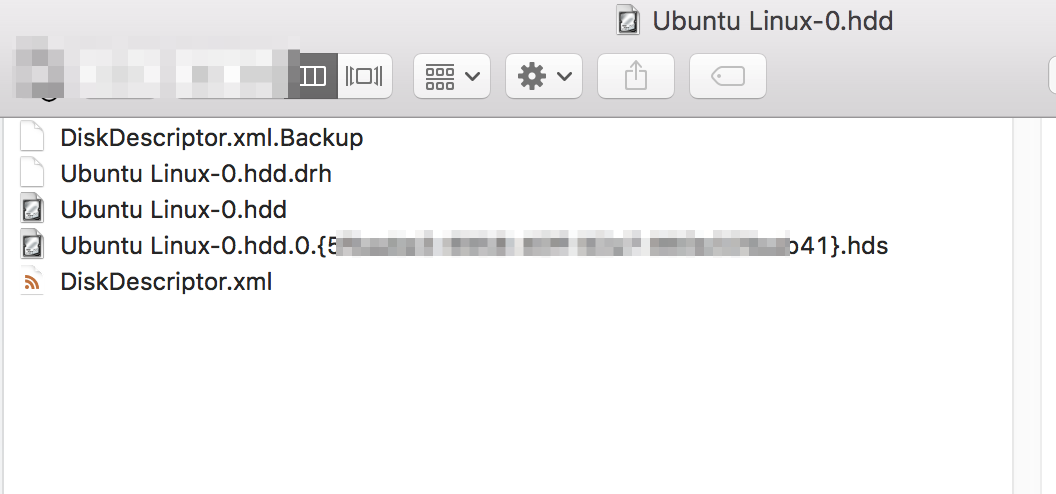
The .hds file seems to be the biggest in terms of file size, so we copy that to a different folder and renaming the file to xxxx.hdd.

step 2
Fire up VirtualBox and create a new VM. Try to match the configuration you used in Parallel Desktop Lite (e.g. CPU Cores, 3D-acceleration, graphic memory, memory, etc.)
Launch VM, at this time the farthest you can get is login screen, and you will be stuck there. You need to go in tty3 mode.
Use Ctrl+Option+F3 (Touchbar model use Fn+Ctrl+Option+F3) and you will go in tty3 mode.
When you complete login in tty3 mode, before you rush into sudo startx, to avoid Could not apply the stored configuration monitors error, I recommend removing monitors.xml:
rm $HOME/.config/monitors.xml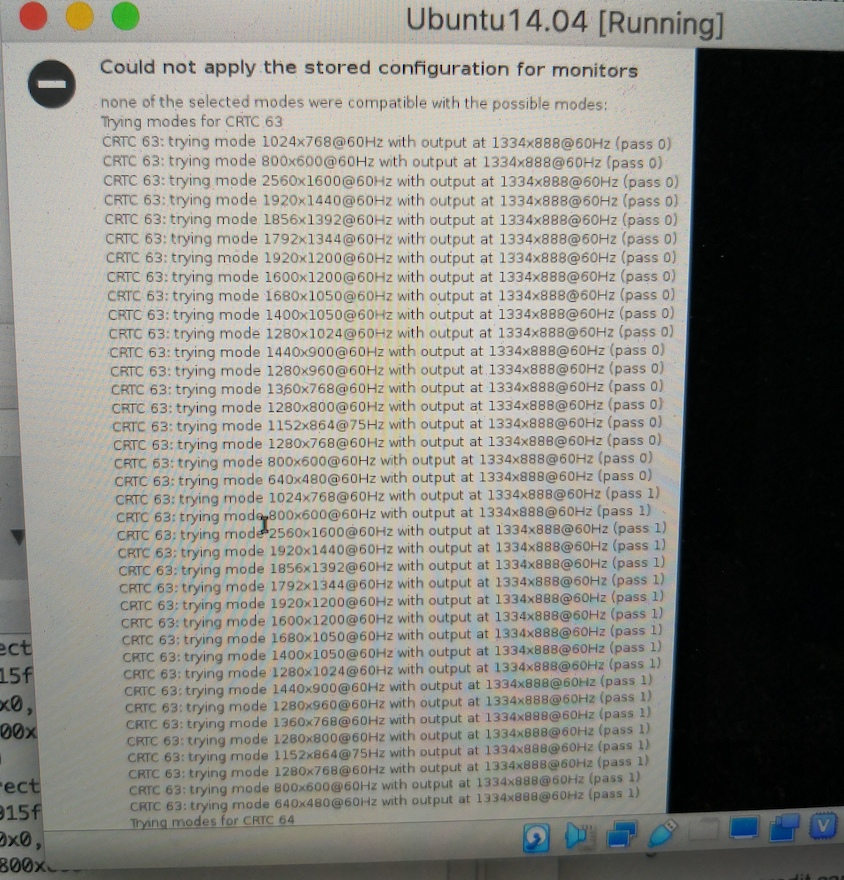
While in tty3, might as well go uninstall Parallels Tools in Ubuntu Linux:
sudo /usr/lib/parallels-tools/install -rIf you go straight into sudo startx now, I am afraid your (Ubuntu) sidebar and top bar will disappear. And also, if you switch to tty7 now, you will face Ubuntu gets stuck in a login loop. Which is why I recommend while you are still in tty3 do:
sudo chown user_login_name:user_login_name ~/.Xauthority
# here user_login_name is the user name you used while logging into tty3 mode
Now by Ctrl+Option+F7 (Touchbar model use Fn+Ctrl+Option+F7), you will be able to login!
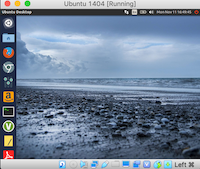
Wait, why is it so small? Don't worry, that's what VirtualBox Guest Addition is for.
Click "Devices" in VirtualBox top bar and chose "Insert Guest Additions CD images", follow the prompt and after it prompt you to press return, press it and restart your VM. Things should be all set now.
step3
Enjoy your VM in VirtualBox with all your data from Parallel Desktop Lite intact!
Possible error when trying to install Guest Additions
In my first time of trying 9 months ago (WOW look how long I managed to procrastinate ('_>`)...), I removed optical drive, which is need to install Guest Additions. To fix this, shut down the VM.
Go to setting -> storage devices -> right click controller: IDE (if IDE is not there, then add it) and select add optical driver -> leave it empty.