Step-by-step tutorial on creating a triple boot laptop of Windows 10, Pop! OS, and Chrome OS (brunch) using grub
Story behind the scene
So I recently bid and won on eBay for a Toshiba Portege Z20t-C 12.5" 2in1 laptop.
This is my first ever eBay bidding and I mostly just want this laptop as a toy and I might use it as a portable TiddlyWiki hosting device. Overall, I am happy with the condition of it. This is not a powerful laptop, with Intel Core m3-6Y30 0.90GHz / 4GB RAM / 128GB SSD, the most outstanding part would be the 1080P touch screen, the included Wacom Pen, and an above par battery life.
So the device came with Windows 10 installed. And I would like to install Pop! OS and Chrome OS and use grub to boot all three systems. Here is how I did it. This guide can also (partially) be used as a guide to dual boot Windows 10 and Pop! OS.
Disclaimer: I generally followed the steps from this youtube video but I simplified the process and made my own generalization out of it.
Steps to take in Windows 10
To reserve disk space for the other two OS, go to disk management and shrink the current C:/ partition (a tutorial can be found here). I reserved 56GB for Pop! OS and Chrome OS. Gotta say, a clean activation of Windows 10 takes up almost 40GB already, I even suspect there is a recovery partition hidden somewhere otherwise how come it takes so much space?
Necessary tarball/iso download
I primarily use a Macbook Pro so using that, I download all the necessary files: Pop! OS 20.04 iso, Chrome OS rammus recovery image (extract and rename the extracted bin file as rammus_recovery.bin), brunch (extract it, this is needed to install Chrome OS to my laptop).
Create a bootable Pop! OS device
I used an 8GB USB stick and flashed Pop! OS onto it using Etcher.
BIOS tweak on Toshiba Portege Z20t-C
The Windows 10 boots so fast on Toshiba Portege Z20t-C it ignores my attempts to enter the BIOS, there are few ways to overcome this:
- In Windows 10 push down and hold the power button to force a complete shutdown, then restart the device while constantly clicking F2 (or F12). F12 helps you choose a different startup boot device but it also has an entry to BIOS settings.
- In Windows 10 choose to restart and when the laptop shuts off immediately press F12 to go into the boot menu, select setup to enter BIOS.
Both ways should get you into BIOS.
Then in BIOS, I disabled secure boot (otherwise the USB bootable stick will not boot into Pop! OS properly).
Save the change and restart, press F12 to boot into Pop! OS USB stick.
In Pop! OS live CD image (system running from the USB stick)
First, connect to wifi, then follow onscreen instruction. Select customize install, then in GParted app, for the 56GB unallocated space, I created 512MB for boot (since this is EFI install, a boot partition is required).
For this 512MB partition, the New size in GParted would be 512, I put the label as /boot, and clicked Add. Then for the rest of the unallocated space, I right-clicked and selected new, and since I reserve 40GiB (include the 512Mb boot) for Pop! OS (meaning I reserve 16GiB = 16384MiB for Chrome os), the New size would be whatever the original value - 16384. In my case, it would be 56833-16384=40449, I put the label as /root, then clicked Add.
Update: Here is something to consider, if you reserved 16GiB like me, after installing Chrome OS you only get about 3 GiB free disk space. I initially only reserved 16GiB and had to resize Pop! OS to give some extra space to Chrome OS for a usable experience. I recommend you reserve 22000MB (~21GiB) or more for Chrome partition.
I then clicked the checkmark to apply all pending operations, now 512MB+39.5GB partition is done!
I then closed GParted, and 2 new partitions would appear in green. Click them separately, and toggle use partition, for /boot or for /root, also toggle the format button and leave the rest be. Click erase and install to finish the installation operation.
Pop! OS is installed, what now?
By default Pop! OS will not install grub or anything, and you can only boot into Pop! OS (no Windows boot menu), so in Pop! OS, we need the following command:
sudo apt update
sudo apt upgrade
sudo apt install os-prober
sudo os-prober #should show windows boot manager or windows:efi or something like that.
sudo apt install grub-efi grub2-common grub-customizer
sudo grub-install
sudo update-grub
sudo cp /boot/grub/x86_64-efi/grub/efi /boot/efi/EFI/pop/grubx64.efi
sudo grub-customizer # uncheck `go into default os in 0 sec`. if you also want to change appearance, be sure to change the OUTPUT_FILE to `/boot/efi/EFI/pop/grub.cfg`
Fixing the System Clock (from System76 website): Windows and Linux store their time in the UEFI firmware differently. This can cause the clock to become desynchronized when you switch from one OS to the other. If you’re affected by this, the easiest solution is to fix it in Linux, forcing it to work the same way as Windows. Set the option using this command:
timedatectl set-local-rtc 1 --adjust-system-clockYou can verify that the change was successful using this command:
timedatectlYou should see RTC in local TZ: yes in the output. If you need to revert this setting, turn it back off with this command:
timedatectl set-local-rtc 0 --adjust-system-clockRestart laptop and you should see grub boot menu with both Pop! OS and Windows 10.
So now we have dual boot Windows 10 and Pop! OS, let's install Chrome OS!
In my Mac, I created a folder called ChromeOS and I moved the extracted files of brunch tarball and rammus_recovery.bin into it. I also modified and created my own multi-install script called tripleboot_chromeos.sh and I move that into the ChromeOS folder as well.
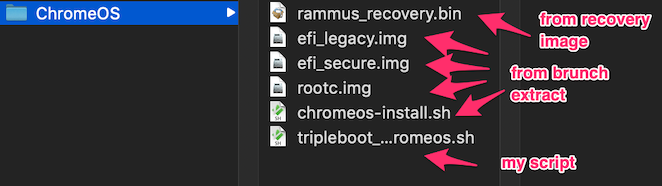
tripleboot_chromeos.sh can be found at https://github.com/sgyzetrov/ChromeOS-booting.
I then copied the ChromeOS folder to another USB stick, plug it into the Toshiba laptop with Pop! OS opened and opened ChromeOS folder in the terminal.
To configure Chrome OS and deal with booting problems, simply run the tripleboot_chromeos.sh in the opened terminal:
sudo sh tripleboot_chromeos.shAfter some apt-install setup, the GParted app window will appear. Select the remaining unallocated 16GiB (or whatever, based on your own configuration) space and format with ext4 (or ntfs, but recommend is ext4 as per brunch README).
The video stated that you have to format with ntfs, not sure why because you DON'T have to.
Remember the partition name for this Chrome OS partition! Mine was sda7, YMMV.
IMPORTANT!!!
So here is another tricky part that I am different than the youtube video. In the video, they put 22000 (~21GiB) as the size for Chrome OS, here I am using only 16384 (16GiB) initially. But neither way would work if you just used their installation script. You would get not enough space to create image error, I observed if you put -s 14 instead for that error-throwing command it will work (I reserved 16GiB, so it needs to minus 2. Same for if you reserved ~21GiB, you input 19). So I have modified this part in tripleboot_chromeos.sh, and it is written to take YOUR_RESERVED_SPACE - 2 as the size for this line: sudo bash chromeos-install.sh -src rammus_recovery.bin -dst ~/tmpmount/chromos.img -s $size; (however, you need to make sure to have at least 16GiB reserved for Chrome OS, the script cannot help you if you don't have that much space). Finally, if you still encounter error after using my script, try to single out and just run that one command (e.g. sudo bash chromeos-install.sh -src rammus_recovery.bin -dst ~/tmpmount/chromos.img -s $size;) and tweak around different numbers for $size (e.g. try sudo bash chromeos-install.sh -src rammus_recovery.bin -dst ~/tmpmount/chromos.img -s 14;, sudo bash chromeos-install.sh -src rammus_recovery.bin -dst ~/tmpmount/chromos.img -s 19;, etc.).
tripleboot_chromeos.sh can be found at https://github.com/sgyzetrov/ChromeOS-booting.
However, if no error was encountered, the installation should start automatically in the console. And when installation is complete, scroll through the console outputs to check for possible additional error messages, when no error appears, copy the two grub entry (between the two long asterisk line in the console output, one for Chrome OS and one for Chrome OS debug mode) into grub-customizer (it will pop out automatically if you use my script) respectively (this part is the same as the video) and you should be all set!
Reference
[1] https://www.youtube.com/watch?v=FEY9MtznYGU
[2] https://www.youtube.com/watch?v=EXZ7_DVxztQ